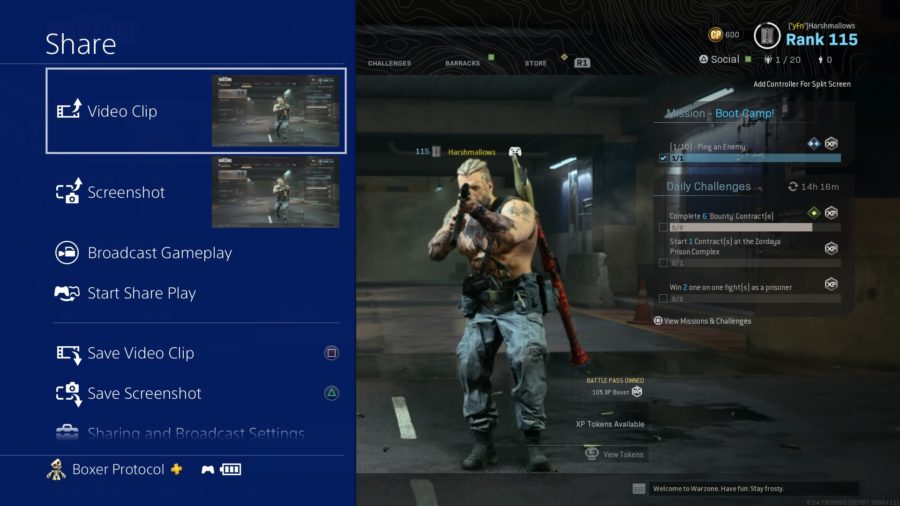
The PS4 makes it super simple to capture your gameplay. Whether you want to capture something you’ve just done, or if you want to plan ahead and set your PS4 to record what you’re going to next, the PS4 has you covered.
Here are the methods you can use to capture recent gameplay or to start recording your gameplay:
Capture Clips from Recent Action
You’ve just pummeled a team of noobs on your favorite PS4 game and you wish you could show your friends how awesome you are at this game. No problem! PS4 is constantly recording your gameplay and allows you to retroactively capture up to 15 minutes of recent gameplay.
- Tap the ‘Share’ button on your PS4 controller
- Tap the ‘Square’ button to save Video clip to your Capture Gallery
There you go! Your recent gameplay action has been saved to your console. It is important that you tap the Share button once. Holding the Share button or double tapping it will result in different actions.
It is worth noting that you can adjust your ‘Share’ button in the options menu of your PS4 to set it for ‘Easy Screenshot’. If you’re looking to capture video clips this option is not recommended.
Set PS4 to Record Gameplay
If you just KNOW you are going to do something awesome, you can set your PS4 to record upcoming gameplay. By default this is enabled by Double Tapping the ‘Share’ button. Your PS4 will now record up to 15 minutes of Gameplay. An icon will appear in the upper left corner of your screen to let you know when the capture has begun and when it has been completed. These video clips will be saved to your Capture Gallery in your PS4 menu.
Getting Your Clips on to Your Computer
You’ve captured some awesome footage of your gameplay and now you want to share it with your buddies. There are a few ways you can do this on PS4.
Start by tapping your PS4 button to bring up the menu and scroll to the Capture Gallery. From here you have a few options.
PS4 allows you to connect your YouTube, Twitter and/or Twitch accounts for sharing. The option to connect these services is available when you are viewing your clips in the Capture Gallery, or you can head to Settings → Sharing and Broadcasts → Link with Other Services to connect these accounts.
You can also export your clips to a USB device, but there are a few things you’ll want to know ahead of time.
If you’re using a USB Thumbdrive you’ll need to format it properly first. PS4 support FAT32 and ExFAT formats. You should 100% without a doubt use ExFAT format. This format will transfer your files at a FAR greater speed than the FAT32 format. It will literally save you HOURS. If you can’t tell by the caps, I have absolutely made the mistake of formatting to FAT32. One hour of video captures took 4 hours to transfer to USB. With ExFat it will transfer in minutes.
Setting the Length of Video Clip
In your Settings menu you have the option to select how long of a clip you want to save. Go to Settings → Sharing and Broadcasts → Length of Video Clip to adjust the timeframe of your captures. This feature is linked to both capturing recent clips or setting the PS4 to record a clip from a specific starting point, which is honestly annoying. I’d prefer the option to record up to 15 minutes, while maybe only capturing 2 or 3 minutes of recent footage. But nope. PS4 does not (at least currently) support this.
Also, depending on the length you set this option your clip may record at lower quality. Longer clips will capture at 720p, while shorter clips will capture at 1080p.
If you’re planning on using the ‘Share’ button to capture recent gameplay, I recommend setting the ‘Length of Video Clip’ to 3 minutes or shorter. This will save you a ton of space on your PS4 vs. capturing 15 minute clips and will be easier to edit down to just the clip you want to keep.

